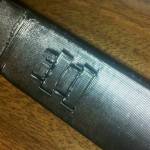
 The first step in figuring out how to print a magazine on a 3D printer is deciding which magazine to make. Those of you who know the gun can probably identify the magazine showing here as being to an M11 submachine gun. We selected this magazine for a few reasons.
One, there’s a factory design that’s made from all plastic, which gives us a starting point. Two, Jason has a legally owned M11 submachine gun.Three, it would be really cool to make a magazine that can keep up with a full auto cyclic rate. Since we’re still prototyping, and have not moved into testing, this might prove yet to be rather cocky. In truth I’d be happy to have one that keeps up on semi-auto.
But there are some difficulties here. The plastic M11 magazine is made from a molded thermoset polymer. These types of polymers form rigid cross-linked polymer chains during the curing process that while less flexible and more brittle, also tend to be fairly strong. MakerBot’s Thing-o-Matic extrudes ABS, which is a thermoplastic. Thermoplastics are less brittle, but also not as strong, and certainly more prone to flex. Â On top of that, there are issues with the extruded printing technique. All of these mean it’s probably going to be impossible for our printed magazine to have a capacity that’s identical to the factory magazine because of the need to have thicker walls due to the limitations of our material and printer.
To the left you can see a CAD drawing of our current prototype. Due to the size limitations on the printer’s build area, it requires the magazine to be broken down into three different sections to be printed, and then glued together at the end. In the drawing you’ll notice there are round disks over or under some of the parts. This indicates the parts in question are to be printed standing up, and the disks are intended to stabilize the part during the printing process. After the print run is finished, the disks can be cut away with an X-ACTO knife.
 Showing above on the right (click to embiggen) a printout of an early prototype magazine. You will notice, if you look carefully, exactly how the printer extrudes. It builds layer on top of layer of strands of melted ABS that are fractions of a millimeter thick, resulting in the texture you see in the photograph. Unfortunately, these ridges provide a rough enough surface to encourage the magazine to hang up and jam. They can, however, be sanded out, but that’s painstaking work.
In further posts I will be talking about my follower design, and maybe I’ll see if Jason wants to come on and speak of some of the difficulties with doing the magazine body, and some of the steps that had to be taken to make it all work.


 The first step in figuring out how to print a magazine on a 3D printer is deciding which magazine to make. Those of you who know the gun can probably identify the magazine showing here as being to an M11 submachine gun. We selected this magazine for a few reasons.