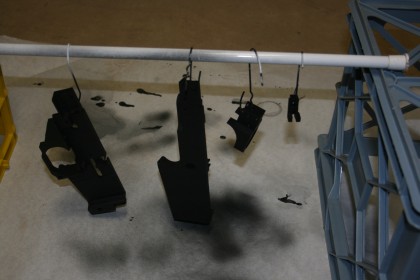
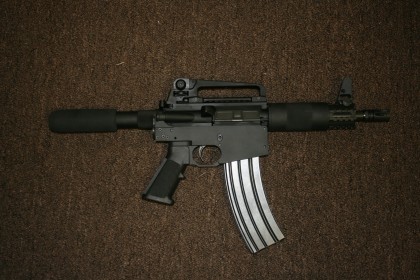
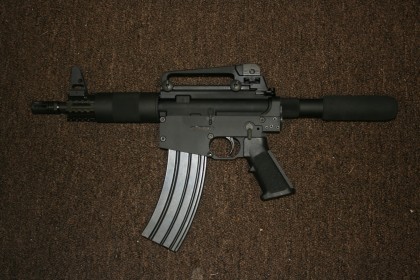
To finish up the AR-15 pistol I milled on my CNC machine, I decided to try Alodine and then Duracoat instead of anodizing. I wanted a process I could do myself, and while I probably could have managed anodizing at home, the process seemed more complicated than I wanted to get into right now, nor do I have a good place to set things up. Buckets of acid wired to a high current power supply aren’t a good things to have lying around with small children in the house.
The basic process is to coat the parts with Alumiprep (a phosphoric acid based etcher/cleaner), wait a few minutes, rise with water, coat with Alodine, wait a few more minutes, rinse with water, let dry, and then airbrush on Duracoat.
The first attempt at applying Duracoat didn’t go so well. After I was done I noticed a few tiny areas around some bolt holes that I missed. I decided to just mix up a little Duracoat in a cup and do some touch ups with a brush. This turned out to be a bad idea for two reasons. One, Duracoat doesn’t look the same when its brushed on. The instructions do say only to airbush it, but I though that for such a small area (1mm so square) it wouldn’t matter. But it does. Two, Durocoat dissolves plastic cups. After I was done when I picked up the cup the bottom fell out and I ended up with paint all over my work table. Luckily Duracoat wipes off pretty easily if you get it before it dries.
Then when I went to assemble the gun, even though I waited the recommended 24 hours for the paint to dry, it chipped off in a few places. Argh! So I airbrushed on a few more coats..
…and then put the parts in the oven at 120 degrees for a hour to speed dry it. This time there was no chipping and no funky spots from the brush touch ups.


Looks good from my tiny little smartphone screen. Why not replace that silly pistol buffer with a standard M4 receiver extension? It’s my understanding that as long as the plastic stock is not attached (or in the vicinity) then it is perfectly legal. And you could quickly remove the stock from one of your other ARs and install it on the pistol, should the time ever come where laws change (or just plain don’t matter anymore like if zombies happen…)
Still too close to “constructive possession.”
So, are the attachment bolts (that hold it together) just snugged down, or get loc-tited, or…?
And are they awkward in any way?
(Just curious; they’re the obvious questions that come to mind.)
Having shot it, I didn’t feel that the bolts would need to be lock-tited. They were pretty snug. Compared to a standard lower, it’s not nearly as fit and finished, but it gets the job done.
Making an AR receiver is pretty cool.
What I really want to see though is someone making a (nearly) complete handgun with one of these. I’m talking everything but the barrel. (And only then because it needs to be rifled to be legal and that’s beyond the ability of the CNC machine).
Even a single shot or two shot derringer would do it for me. Something where I could run off the receiver, fire control parts, and other bits ‘n pieces and then just install a factory barrel from some other gun to complete the “kit”.
If anyone does release that program, I’ll buy the CNC machine.
The difference is that with an AR you still have to have a source fof all the other parts. The CNC machine just makes the receiver (which is legally the gun, I know). What I want is the WHOLE GUN minus just the barrel, just to show it can be done.